
by C. Skema, Anne Barber, and Tim Block
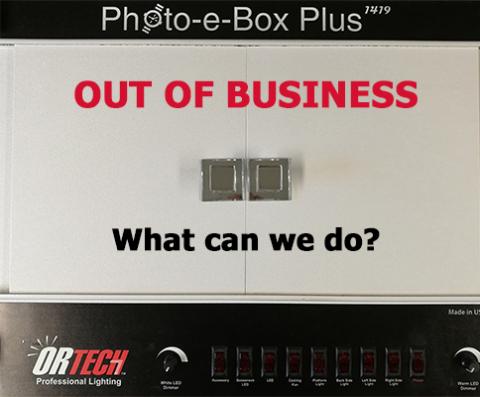
 Shortly after the Mid-Atlantic Megalopolis (MAM) Thematic Collections Network received its funding from the National Science Foundation in September 2016, the main manufacturer of herbarium light boxes went out of business. By buying up the last of the light box stock available in the marketplace, most of our collaborators managed to procure a box, but three were left without one. We were barely a few months into the grant and we had already hit a significant obstacle in equipment procurement. What to do? We found a local design/build firm that was willing to design and produce four light boxes for the MAM Project. The design process was a steep learning curve for MAM, but we put our heart and soul into it with a goal of helping future herbarium digitization projects by building an excellent light box at a lower cost point than the previous standard. Fast forward to fall 2017 (the entire process took much longer than expected), when four, finished light boxes were delivered to MAM. Shortly thereafter, we heard the design/build firm had already decided that there was not enough of a market for them to continue production of the box. So much for affecting a positive change in the herbarium digitization community! Nonetheless, here are some lessons we learned, both the positives and the negatives, in the design and build process for a light box.
- Consider box dimensions
Our box had dimensions similar to that of the previous standard light box. The exterior box was 26” wide × 17.25” deep × 15.5” tall, with an interior, open-fronted, nested box of 20.5” wide × 14.25” deep × 12.5” tall. We had considered reducing the height of the box, but decided that a drawer (or similar solution) it would require to get specimens in and out could slow down the imaging process significantly. Twelve inches seems to be just about right for the height needed to quickly move specimens in and out of a box without damage.
- Material matters
The appropriate materials to use for the box are perhaps more restricted than one might think. The previous standard light box appears to be made of acrylic, a very hard and rigid plastic that works well to create a very sturdy, structured box. In our design process, high-density polypropylene (HDPP) plastic was used. Our prototype box made simply with HDPP walls was too flexible and the walls showed significant bowing at points furthest from the fasteners; it was too flimsy for use. The design/build firm came up with the (perhaps inelegant) solution of installing a steel frame inside the box interior and fastening the HDPP panels to it. The steel frame certainly made the box much sturdier, but also much heavier. Acrylic may be preferable, allowing rigidity and sturdiness while being lightweight.
- Correct lighting is key
This may seem like an obvious statement given that this is a light box, but getting the lighting right is not as easy as it may seem at first glance. We quantitatively, and some might say obsessively, measured the light distribution over repeated specimen images, changing the placement and amount of lighting in the box, until we achieved a sufficient quantity of light and a nearly perfectly even distribution of light across the face of the entire sheet. The successful lighting design for our box requires three full spectrum (RGB) LED “strips” on each of the following interior faces of the outer box: back, left side, and right side. Each strip of LEDs consisted of repeating modular units of 24 LED lights (24V), extended along the length of the box on that face. The back panel had 10 repeating units (240 LEDs) in each of its three strips, and each of the right and left side panels had six repeating units (144 LEDs) in each of their three strips. To diffuse and even out the light, the LEDs sat behind translucent, acrylic walls of a floating, open-faced box that sits inside the outer shell. (All the back and side LEDs were aligned so they sat on the exterior box walls at positions directly across from the interior acrylic floating box.) Most critically, a single strip of LEDs, with eight repeating units (192 LEDs), was placed on the underside of the top of the box above the door opening. Without these LEDs, we found that there is a significant shadow in the specimen images on the door side. (This last strip of LEDs shone directly on the specimens, not through an acrylic panel, as the interior floating box was open to the front.) Realize that lighting is relative to the size of the box and the distance from the specimen; refer to the first bullet point for the box dimensions in which this lighting design worked best.
- Keep the light box separate from the camera
Early in our design process, the design/build firm proposed attaching a post and camera mount to the light box to use in lieu of attaching the camera to a copy stand sitting beneath the light box. They argued that combining those elements would make for a more convenient rig and could lower the price point. It seemed like a good idea, particularly given the possibility of cost reduction. The design of our box had an extruded aluminum post mounted on to the back of the box with two brackets (one at the top and one at the base of the box), and an off-the-shelf camera mount at the top of the pole. The camera mount and the aluminum post were an order of magnitude cheaper than the typical Kaiser mount and copy stand most herbarium rigs employ, and sadly, they were much inferior. Neither was nearly as sturdy as the Kaiser mount and post, and we found it difficult to get the camera lens perfectly parallel to the specimen. Beyond issues of product quality, an even bigger problem was that attaching the post and camera mount to the box itself created a situation in which the light box shakes briefly every time a specimen is taken in/out of the light box and the door is opened/closed. We had never realized that having the light box as a separate component from the copy stand and camera mount had allowed for some sort of shock absorption during the use of the box, which buffered the camera from shake which affects the focus quality of the images.
- Door design is critical
The boxes we developed with the design/build firm had a door that opened out towards the user, swinging vertically, like an oven door. During the design process, we were taking image after image in a slow and painstaking way – which is not very much like how actual imaging happens for a digitization project – trying to get the lighting specifications and ergonomics of the box right. We did not realize until after we had the boxes in hand that we had never analyzed the resulting images from an imaging session where we let a technician do what they normally do, which is take images at a rate of >150/hour. This is a very different use! It did not take long for us to realize that the oven door was problematic at high speeds. Not so much in how it opened, but in how it made the box, and then the pole, and then the camera, shake with each closure. Any image taken in extremely quick succession with the last (about 1 in 4) was blurred as a result. It was obvious that the door problem was interrelated to the problem of having attached the post and camera mount to the box (as detailed above), but even when we detached the post and placed the oven-door box on a Kaiser copy stand and camera mount, we still were seeing shake issues resulting in blurry images at regular imaging speeds. Using a drawer slide, we have since been experimenting with a door that mimics a barn door, sliding open to one side, to try to reduce the impact at closure and thus reduce the shake. It works better, but it is not a complete solution. In retrospect, we believe the design of the previous standard light box, with half doors facing one another and hitting each other upon closure, actually had a dampening effect on the shake created by that closure. Whether purposefully designed that way, or a happy coincidence, it is a great design and should be replicated in future attempts. Unfortunately, we cannot mimic it with our four boxes because of where the lighting dial sits on the front of the box.
- Electronic “surprises”
Be aware that the use of pulse width modulation for controlling the brightness of the lights could potentially create problems when using live view on the camera. Pulse width modulation turn lights on/off at some frequency to control brightness. If that frequency lines up with the refresh rate of the camera’s live view, as it did in our project, you will actually see dark lines moving across the screen when in live view, making it unusable. This problem was solved for us by changing the frequency of the pulse width modulation so it was out of sync with the live view refresh rate. An alternative solution would be to go analog and control light brightness with a potentiometer instead. Lastly, despite using LEDs, which should not generate heat, the light box does require a fan because the power supply for the LEDs will typically generate heat. This was something overlooked in our process for some time.
We hope our experiences can help others coming up against the challenge of sourcing light boxes for herbarium digitization work in future, particularly anyone who goes down the route of designing and/or building a new box, or hiring a firm to do it for you.